
Increased performance isn’t always a tire-shredding thing.
Looking at your car as a system – modest, incremental gains all add up. Those with turbocharged, modern BMWs make it look easy. A simple ECU flash can put another 60 or 70 horsepower under the hood in a matter of minutes. I’d be lying if I didn’t think that was totally cool. But with an older, normally aspirated car, that’s not going to happen.
If you have a mid 80s – mid 90s BMW, there’s a good chance you’ve heard of Mark D’Sylva and his company D’Sylva Technology. He provides a series of upgraded ECU chips for a wide range of M20, M30 and a few other engines in that range.
 Let’s cut to the chase – his product is excellent, and the value proposition high. In this case, I ordered a chip for my 91 535, and there are three options – one retaining stock redline, one increasing it to 6500 rpm, and another going all the way to 6800. All have a very reasonable cost of $229, and claims to add about 20-25hp. But this isn’t the whole story.
Swapping the chip is pretty straightforward, and the instructions with the chip will get you through, but I’m including some fairly close up, high resolution images for those of you that would like a bit better look at the process. If you’re new to all of this, it’s a pretty easy operation, requiring only a few basic tools (TORX 20 driver, 10mm socket and extension or driver, a long Phillips screwdriver, needle nose pliers, and a thin straight blade screwdriver). Plan on the entire operation taking about 45 min at a leisurely pace.
 Step one: remove cover, exposing ECU
After lifting the hood/bonnet, the black plastic cover you need to remove is on the upper left/passenger side of the engine compartment. Each of the four corners of the case are fastened with a large, phillips head screwdriver. As these cars are all pretty old, I suggest a screwdriver with a large phillips head (as these screws are pretty soft) and long reach. Fortunately, the screws don’t pull out of the case all the way, so you can pull the cover out once they are all released.
Extra credit: Take that black cover, clean it up, and apply a thin coat of Gyeon Q2 Trim ceramic coating. You’ve gone through this much, make it look nice when you put it back together!
 Step two: disconnect ECU
Once the cover is removed, and you are looking at the windshield, you’ll see three nearly identical boxes with three big connectors – each having a large mass of wires. You want the top one, this is where the ECU is. Take that straight blade screwdriver and gently pry the silver handle up as shown. When this comes up all the way, it frees the big cable connector.
 Again, the key here is to be patient and go slow, with minimal force. Rock the connector a little, until loose. It will come up, separating from the box, but there is not a lot of play with the cables. After removing the connector, it’s time for your first challenge. Get ready with the 10mm socket or driver, but note it’s pretty cramped in here. Try not to lose the 10mm nut when it comes loose, or fishing it out of the engine compartment will make for short term frustration.
NOTE: Before you dive in to this, keep in mind that the metalwork surrounding the ECU is all razor sharp, so proceed deliberately, so you don’t cut your hands.
 Step three: Open ECU box
Once removed, flip the box over and you’ll see the two Torx 20 screws that need to come out. There are two much smaller Torx screws, but those can stay in place.
Next, there are a series of 9 metal tabs that hold the case together. Use your slim blade screwdriver to bend these up straight, so that the case halves can separate easily. Try not to bend these any more than necessary, as you will need to bend them back in place when reassembling.
Step four: Swap the chips – the good part!
Now you are half way, and thinking about the extra power, but stay focused. With the open ECU situated as you see in the pic, you’ll see two rectangular chips at the bottom of the circuit board. The one with the white plastic guard is the socketed one we need to change. Before you remove this guard, ground yourself to something nearby to discharge any static electricity you may have accumulated. If you’ve ever added RAM to a computer, this is the same kind of thing.
 Be very careful (and gentle) with removing this plastic cover. The one on my car was fairly stubborn and took a min or two, but again, this is 30 year old plastic, so we want to avoid breakage. Once removed, you’re ready to swap the chips. Notice the small, half-moon cutout at the left side of the chip.
Match this to your new chip, and again, very gently pry the old chip out. Apply a little upward pressure on one side, then the other, so it eases out of the socket. As they say in the repair manual for my 1973 Kawasaki 500, “assembly is reverse of disassembly.” Kind of. Take your new chip, oriented the same way, and very gently ease it into the socket, being careful not to bend any of the pins. Bend the pins, and you’re hosed.
 Step five: Close the ECU box up
Once you lower your ECU back onto its cover, take the needle nose and crimp the tabs back down to the case, so it’s all snug like you found it. You’re almost there.
 Step six: Final install and cleanup
Put the ECU box back in place and secure it down with the two 10mm nuts, again being careful not to drop them in the engine compartment. Those reading will laugh, but those finishing this task will breathe a sigh of relief.
This is the last time I’ll tell you to be gentle. When re-installing the large connector, ease it to the side where the wires are and slowly rock it backwards until you feel it drop into place. Then, click the front half into place, and snap the silver clip down.
 Lower that black cover, tighten up the four phillips screws, and you’re almost done. See how nice that cover looks clean?
Step seven: Fire it up!
If the car does not start, you’ve either not connected the ECU with the big cable all the way, or (and I’m praying to the car Gods for you right now) you bent one or more of the pins on the chip. If you have bent the pins on the chip, there’s a 50/50 chance you can rescue this. Go back, take it all apart, ground yourself again and with the help of a long needle nose pliers, try and straighten the bent pins, being super careful not to snap them off.
Assuming all is well, and your car starts without issue, D’Sylva suggests letting the car run for a minute or two after startup before driving off. Being a little bit OCD, I pulled out of the driveway as the stopwatch on my phone went to two minutes and headed down the street for a leisurely drive to grab a mocha.
Even from the initial drive away, the car feels smoother through the rev range, a little perkier overall. But I’m trying not to let expectation bias creep in. About 25 min later, mocha ingested, and fluids thoroughly warmed up, the test drive begins in earnest.
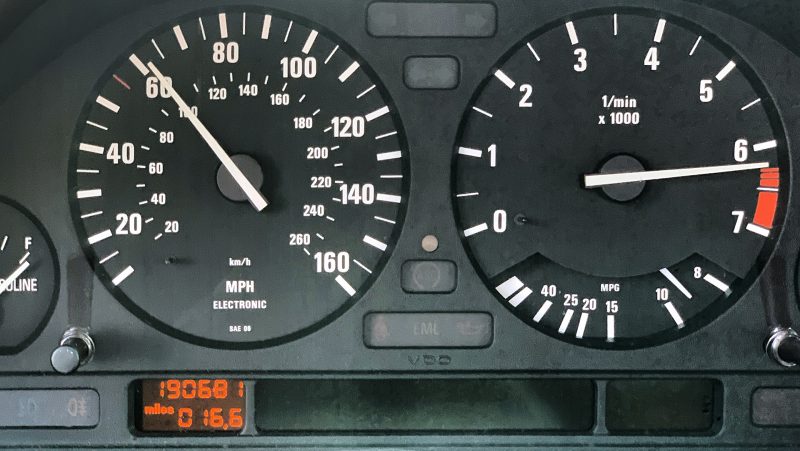
Oh yeah
I’m assuming that if you’re driving a relatively stock 535 E34, you’re more about the driving experience than racing 0-60. The improvement from the D’Sylva chip is subtle, distinct, and at the same time a major improvement. By far, this is the best $229 I’ve ever spent on a car upgrade.
The increased redline is nice, (I went for the 6500 rpm version)but the change throughout the range of operation is what really excites after installing the chip. As my tank was fairly empty, I headed straight to gas up with a full tank of premium (you will need to run premium fuel now) and spend another 10-15 minutes of moderate driving.
Heading out for familiar curvy roads, the 535 is a completely different car. The extra power really shows itself when cruising up familiar hills in third gear, where the car used to labor a little bit, but no more. Add to that a major increase in responsiveness between 3500 rpm and redline increases the fun factor of this car dramatically. Before the chip, I drove the car more for the torque that the M30 is famous for, but now, it’s a lot more engaging to push a little harder and rev through the gears.
Incidentally, 0-60 does come up a little quicker and definitely easier now that it only takes one shift to get there. Brisk sweepers are a little easier to maneuver, being that you don’t always have to shift between third and fourth gears as much either.
Past experience with Motronic cars has been they take about a full tank of gas to “learn” new parameters, so I suspect that this car will become even perkier by the time I need another tank of gas. Now, I’m more motivated than ever to get those Konis and springs installed!
 Final thoughts
Mr. D’Sylva has been exceptional to deal with in every way. He was very helpful in answering my questions, and shipped my order promptly. I need to hit him up for a chip for my 91 E30 asap, and if the ECU on my 84 733i is compatible, that car as well. I’m a believer. He gets our highest recommendation. I’m ready to do this again!
Here is a link directly to his site, where all the models he works with are located. Enjoy!
 Hello and welcome to Heel and Toe.


